Showing posts with label Halloween. Show all posts

October 22, 2012

Wicky Witch


Hello Monday! I am up on the Clearsnap blog today with a new tutorial for creating this witch canvas with the new Stephanie Barnard Sprays! inks. 

Come take a peek and have a great week!

October 18, 2012

Halloween Treat Bag


Hello again! I am up on the Pink by Design blog today - click here to see the rest of this Halloween treat bag using the Chevron Background, Nature Walk and Instantly plus pigment inks from Colorbox.

Hope your day is great!

Animal Mask Pattern @ The Odd Girl


Hi there. Just popping in today to share about a guest post I have up at The Odd Girl. Kristy kindly invited me to celebrate her blog this month and is sharing tutorials and giveaways all month long - I hear there is even a Copic marker giveaway so be sure to check it out! She designs the cutest stamps - digital and acrylic - too so be sure to visit Some Odd Girl stamps to take a peek!

I am sharing a pattern and tut for these felt animal masks. Super easy to create and perfect for everyday play or a last minute Halloween costume! View the entire post here.

I made a few extra too just in case you don't have time to create your own - they are available for purchase in my Etsy shop.

Thanks and have a great day!

October 13, 2012

Halloween Harvest

Paper Issues - Halloween Harvest Theme DT Projects

Hi there! Are you busy carving Jack-o-Lanterns and putting together some spooky decor this weekend? I wish I was!! Halloween is the new theme at Paper Issues - generously sponsored by Gossamer Blue Kit Club!

Link up your paper projects and enter to win here.

Find a lotta inspiration from our talented creative team on the blog hop starting here.

Pick up some new goodies in the Paper Shop. How about this gorgeous fall wreath kit from Maya Road? Use code LOVE20 for 20% off your order.

Have a great weekend!

January 25, 2012

October Mini Album

Just this past weekend I attended my very first crop. It was super fun and even though I didn't get as much done as one would think in 6 hours - I absolutely loved it!! Can't believe I waited this long to actually attend one.


So I worked the whole time on the mini book I started for the month of October and Halloween. Somehow I filled all 30+ pages and it ended up twice as fat as expected. None of the pages will stay open by themselves. You can see the "before" pages here.


And here is a look as a few of my fav pages. Okay more than a few, I am really excited about how this mini turned out!


InLinkz.com


 Almost everything I used for this project is sold out already at 2Peas, but they are having a HUGE pre-tent sale right now if you are interested! Enjoy your Wednesday!

November 1, 2011

Happy Happy Halloween

We were having far too much fun yesterday to post any pictures from our Halloween but here are a few (okay maybe more than a few)....

exploring on an autumn afternoon
kids drew the face and I carved

apple nachos with caramel, marshmellow, chocolate, white chocolate, honey and peanuts
make-shift mantel
spooky silhouettes
Night Eyes at the zoo
somewhere over the rainbow - Austrailian Outback
interview with ZooTV
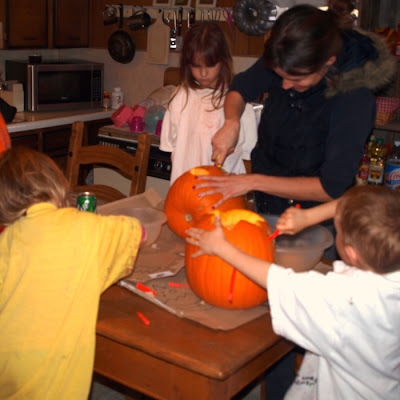
carving pumpkins
kids drew the faces, I carved, they scooped the insides
kid's pumpkins all a-glow
and dad's creation , always classy
trick of treating New Virginia
Costumes - witch, (last minute) fancy cat, black spiderman, mermaid, princess 
scary witch!
trick-or-treating Winterset
 The kiddos are waking up so that's all for now. Hope your Halloween was very scary!

October 27, 2011

Halloween Costume: Little Mermaid


Yesterday I finished up the final kiddie costume! Saved the hardest one for last since I never did find a pattern that was just right. The green sequin material and netting came from Joann's and the purple is from a thifted wrap top and tank. Pattern was made from measuring her clothes.


We couldn't do the sea shell top because it will just be too cold so I sewed in a tank top covered with a sheer top. It's just disassembled from the wrap top and sewn together in a smaller size. Left an opening on the outside of the sleeves and added in a couple fins there. Ariel doesn't have those, I was told, but she did accept it when the costume was finished.


There are fins on the sleeves and also on the hips. I put a wire stem in each one to help them stand up a little.


And the tail. It was so hard to make this look realistic and easy to walk in. We settled in the middle and added some extra ruffle detail to make up for the lack of authenticity. There is about 2 yards wide of tulle ruffled together to help it poof out. Hmm, maybe I could just sew an extra triangle of fabric in between the fins? That might look much better.


Added a fin in the back as well.


My little gypsy fish. We're off for the first round of trick-or-treating tonight at the zoo. What are you planning to be or will you dress up at all?

October 25, 2011

Halloween Costume: The Black Spiderman


Halloween costume #2 - the black Spiderman. I think maybe he is Spiderman's villainous alter ego but not totally sure. He costume is way cooler and that's all the matters to the young ones.

We made a half mask rather than a full face mask for easier access to candy eating.


The costume is all attached - I just used a pattern for a one piece pajama and added a belt. Still need to stop by the store and pick up some iron on transfer paper so I can add a spider to the chest area.


The back closes with a button. Pretty simple and he really likes it.

Off to do sewing for one final costume....

October 22, 2011

Halloween Costumes - Pretty, Pretty Princess


First Halloween costume finished. Actually make that two. I've been sewing like a mad woman this last week trying to get all the kids' costumes together and only one left and still a full week ahead of me! Phew.

All the kids have stuck with the same idea for what costume they wanted since summertime, which is quite a feat if you ask me. Leah wanted to be a princess, plain and simple, so we went with a pretty, girly version with sort of a Renaissance feel.


I think the hat really makes it. It was so simple to make with just two triangles of felt, a sheer scarf and a bit of ribbon to keep it on her head.

For the dress, I used Simplicity 2463 and 2460 for the sleeves. Had really wanted to add those long flowy sleeves but there just wasn't enough material in the dress I upcycled.


These sleeves are super cute though. The same one's I used for her 4th birthday dress.


Also added some trim to the middle section to give the look of a corset. Along the front neckline and sleeves I added some pintucked material from a thrifted silk top. And rather than gathering the skirt along the top, I added pleats.


Ooh and the skirt is my favorite part! It was just cut from the bottom of the thrifted dress so no need for hemming or anything! I turned the vent to the front so there would be a mountain of tulle piling out. There is also a large gathering right in the rear so she has a big booty bump like all the gowns in Cinderella. KWIM?

On the inside, I pinned up sections all around and just stitched a little pinch to give it this look that I'm not really sure is called - drapyness? If there is time, I'd be great to go back in and hand sew little flowers or beads at all the pinches. Am crossing my fingers for that.


And the before of the material. It was a pretty Vera Wang bridesmaids dress that I picked up for $1. Tags still attached. A shame really, I almost hated to cut into it, but it was the perfect shade of pale pink.

Check back tomorrow for a peek at the black Spiderman :)