Showing posts with label spring. Show all posts

June 25, 2012

PTI June Blog Hop


Hello and happy Monday! Hoping your weekend was great. This is my very first time participating in a PTI blog hop but this inspiration photo and colors were just so too good to pass up :) I must say that this card ended up in a very different place than the design originally in mind but I made my mistakes work and am still happy with the card that resulted.


Most of the papers and embellishments on here are scraps from off my desk and I just could not get the box pleats to work at all so went with a scalloped border instead. Will be on the lookout for any tips on pleating paper! Also pulled the gray from the photo and added just a touch of orange since those little butterflies where already stamped and looked so cute added in!


And here is the original inspo piece. View all the entries in the hop here.


In other news, we visited the Science Center for the first time this weekend - really fun even though the kids are just a little too young to fully enjoy and understand everything they were discussing during the programs and experiments.


And I also made it to 27 weeks! Its getting a bit uncomfortable and things like bending over and picking up little ones are awkward but I have a feeling the rest of the time is going to fly by. Crossing fingers at least ♥

May 23, 2012

Pretty Party Banner


Hello! Just dropping in today to share a party banner I created earlier this month for the Clearsnap blog using the luscious Mix'd Media Inx and Embossing Powders. I'll post just the photos below - you can find more details, the video tutorial and a complete supply list on this post.

Have a great day!


April 23, 2012

Tuesday Trigger: Watercolor Butterflies


Hello and happy Monday! It's been awhile since I've had a chance to play along with the Moxie Fab trigger but this week's inspiration was just too pretty to resist (pun intended!)

I really love using the watercolor resist technique but instead of dye inks, this time I experiemented with Smooch Spritz and wow! The color is much more vibrant and blended together much more naturally without having to use a ton of water. Plus you get the extra shimmer particles from the Smooch and the little paint splatters from the spray bottle.

Loving how this turned out and was able to put the butterfly stamp collection to use! Click here to play along, the inspiration image is below.


Have a wonderful week!

March 29, 2012

Pink by Design Projects - March

Hi there! Just wanted to fully share the projects I created for the Pink by Design blog in March (and one in Feb) in case you didn't get the chance to check them out on the blog.

First, from the 8th - Golden Sunshine.


Lots of sunshine here and I also shared a tip for using your Chalk Inks to stamp on glossy surfaces - it works the best! The sentiment, which inspired the card, is from Rain or Shine.

From the 22nd - Rainbow Bubbles.


This one was super fun to create using dye inks as watercolors and a sentiment from Rain or Shine.

And one from Feb which hasn't been shared yet - Dream Big.


This layout for my step-daughter uses both the Subway Art set and the Canvas Background. Love all these colors together!

Have a lovely day!

March 7, 2012

Altered Basics Blog Hop


Welcome to the Altered Basics Blog Hop! The Clearsnap Design Team is inking and altering our Basic Necessities, a variety of packaging materials and containers released at the CHA-W 2012 show in Anaheim, CA earlier this year.  These "Basics" allow you to create custom inkpads, mix your own color combinations of Smooch Spritz and glitter, as well as provide a blank canvas for cute altered gifts, like the adorable tins our My First ColorBox Stamps are packaged in. You might recognize packaging from some of your favorite Clearsnap products like the salt shaker style jars from the Donna Salazar Designs Fairy Dust Glitter, an uninked ColorBox inkpad, and the Clear Boxes our Smooch Spritz Assortment Packs are packaged in. We think these Basic Necessities will allow your creativity to soar!

We're also excited about giving away a set of select Basic Necessities items as prize for one hop commenter! Just click on the blogs each day, browse through the post and check out the "Altered Basics," and then leave a comment about your favorite Basic Necessity to be entered to win.

For an extra entry, post the secret phrase "I love the Basics!" on our Facebook Page here: http://www.facebook.com/Clearsnap

We'll choose one winner from all of the comments on March 9, 2012!

March 7, 2012
Sabrina Alery - you are here

March 8, 2012

Don't forget to leave a comment about your favorite Basic Necessity on each blog in the Hop. Happy Hopping!

--the Clearsnap Design Team


From the Basics products, I selected the Jumbo Smooch Spritz bottle to alter. We have a couple birthdays coming up later this month and this butterfly will be positioned with a "toppings" sign to let everyone know where the goodies are for the ice cream buffet.


The inside is filled with candy sprinkles and all the spraying parts are still intact, though hidden. Since it's such an awesome bottle and will surely come in handy sometime in the future, I made sure everything is removable so someday it can again become a bottle for spritzing.


The wings are inked, stamped, sprayed and glittered with several layers of Clearsnap goodness. To start with, I stamped and blended repeating images with a few different sets of the new My First Colorbox stamps on different parts of the wings. There are 5 colors of pigment ink total from both the Classic Pigment line and also the Mix'd Media Inx - Lime, Berry, Chiffon, Honey and Truffle.


The next coat was Smooch Glitz in Pink Fizz and Frost, followed by a light sprinkling of Fairy Dust Glitter. Although I'd like to take credit for drawing in the wing segments myself, I actually cheated here! They were printed on and I just outlined them with a little Smooch in Molasses and added a few spots.


The final layer was a couple different shades of Smooch Spritz - Cosmic Pink and River Mossy. I covered the sprayer portion of the bottle with cardstock and dressed it up with a little trim and pins from the Hydrangea Hippo. So easy and fun!!

So what are you looking forward to creating with the new Basic Necessities?

Next stop on hop the lovely and hilarious - Mary Dawn.

May 8, 2011

Happy Mother's Day!!

Hope your day was as beautiful as you, mother. xoxoxoxo


Pics from Pella Tulip Festival

March 31, 2011

4th Birthday Dress + Rainbow Cake

The twins celebrated their 4th birthday on the first day of spring. We had a fun, low key day - hanging out, doing whatever they wanted with cake and corn dogs for dinner followed by their first time at the movies to see Rango. (I liked the movie maybe even more than they did!)


They love baking and helped to make a 4-layer rainbow cake with funky frosting -yum! (I've seen this idea several places online, but sorry no links as to where).


Even though they knew we put food coloring in the mix it was still a surprise to cut the first slice!


Leah got a special birthday dress made with Simplicity 2767 in her current fav colors - pink and green. The fabric is from lines Hunky Dory (Chez Moi) and Hushabye (Tula Pink). She loves it and is wearing it again today even!


The sleeves are the very best part of the this dress! The little pleats make it extra special.


An invisible zipper down the back (although the invisible part didn't work out quite right).


And of course the matching hair ties. Her hair is just so sweet in low pigtails.


Keegan is a jeans and sweatshirt guy just like his dad and picked out his own clothes here. I didn't push it since it was his day. He got his first BB gun and ran around exclaiming "I got a real gun just like dad!"


Unfortunately he isn't quite strong enough to cock it on his own yet. Maybe by fall he can go squirrel hunting with dad.

They both had a great day and I must say having a small family party is so much less stressful for all of us than a big party with tons of guests the kids don't really know. This is definitely the way to do it.

(Despite that last statement, did you see this Dora themed party on Prudent Baby? Crazy!!)

October 25, 2010

Flower Pins

Hello friends! I am back in my hometown visiting family this week but have brought along a few projects to share with you. These hair pins were made using the tutorial I put together for Ruffles and Roses. Make the flowers but rather than attaching them to the headband, slip a bobby pin through the threads in the back to secure. Stick one in your hair to create an instantly pulled together look on even the most rushed days.

These are so easy to create, especially when you make a batch - don't be surprised, family and friends, if a set of these show up in your stocking this Christmas!

July 22, 2010

DIY: A Rainbow of Butterflies

\When you start to look for it, inspiration is everywhere. Like when I was reading Winnie the Pooh to the kids and a drawing of butterflies suddenly brought to mind a pretty paper rainbow of the fluttery creatures. As soon as the kids took a nap, I got to work and came up with this embellishment, which I saved forever to put on a page for the month of April.


I adore it so much and decided it couldn't be tucked away in the pages of a scrapbook - why not make one to hang on the wall as well? And photograph the process so you can make one too! After all, I can't be the only one who loves butterflies and rainbows.

So to begin, you'll need..


Supplies:
plain black frame (12x12)
cutting mat
circle cutting template
craft knife
butterfly punch
2 sheets white card stock
5 solid color card stock papers - red, orange, yellow, green, blue
5 patterned papers - red, orange, yellow, green, blue
3 cloud die cuts (or make your own freehand)
glue
dimensional foam adhesive
old newspaper or cardboard

Instructions:
1. Cut a 5.5" circle from one sheet of the white card stock.
2. Using your solid red paper, use your template to cut a 4.5" circle and without moving the papers, cut a  5.5" circle around the smaller one. You will end up with 2 circles that look like this:


3. Now cut the remaining solid colored papers as above. The finished sizes should be red - 5.5, orange - 4.5, yellow - 3.5, green - 2.5, blue 1.5.


4. Lay down some old newspaper or cardboard to protect your work surface, then spray or spread glue over the first white circle. Now adhere the red circle around the white card stock and fill in the center with the remaining colored circles to make the rainbow.


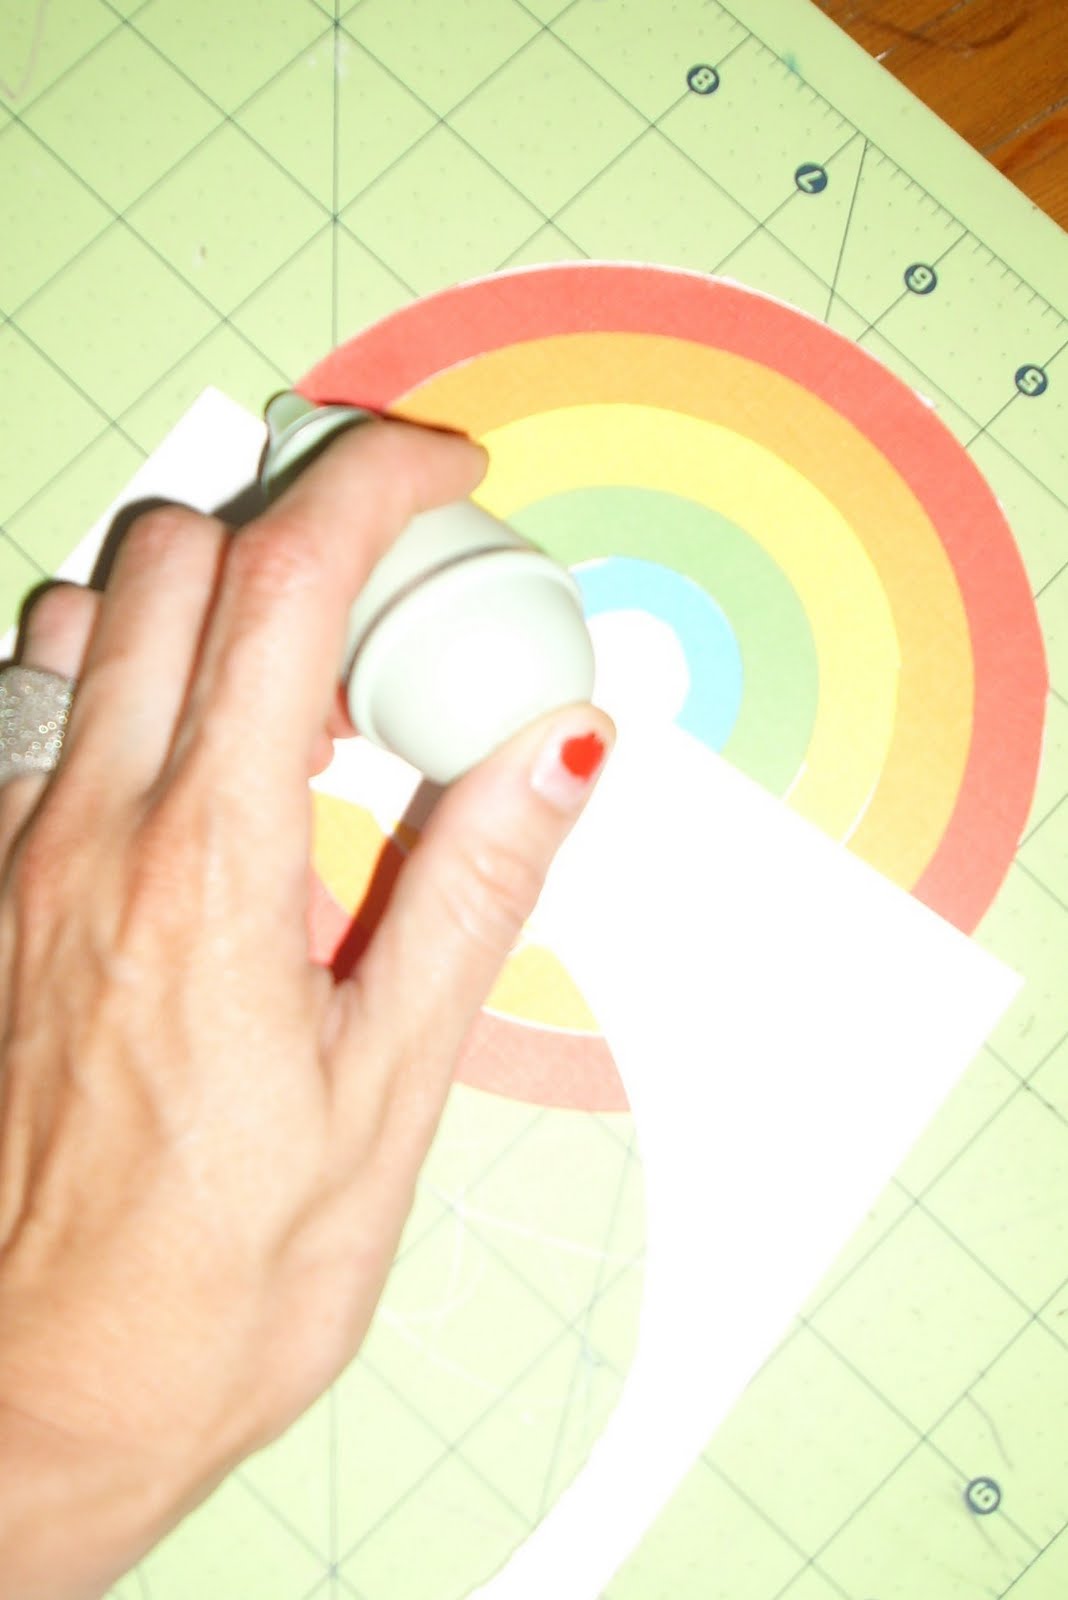
5. Using a piece of even scrap paper, cut the rainbow in half a little below the center. Then cut out the remaining white center of your half rainbow. The outlines of my circle are a bit uneven, but that's okay - we will cover it up in the next step.


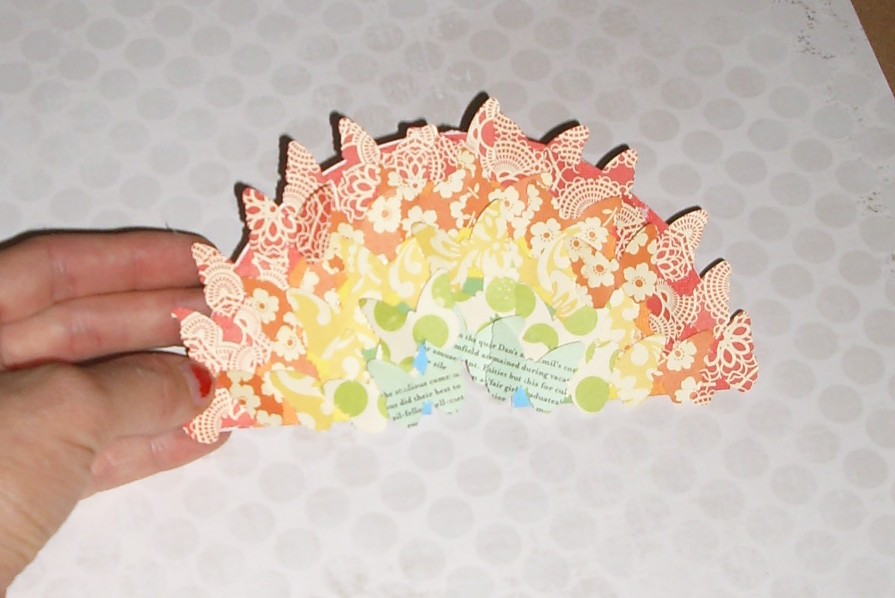
6. Next we punch out the butterflies from the patterned paper. I used 12 red, 9 orange, 7 yellow, 5 green and 3 blue. You may need more of less, depending on the placement. Bend them in half so they appear to be fluttering ;)


7. Arrange the butterflies on the rainbow starting with red and working toward the center. On each color layer, I raised one butterfly above the pack with the dimensional foam adhesive. The inside of foam letter stickers that you normally throw away works for this.


8. Next glue the other piece of white card stock to the cardboard back piece of your frame. Glue it to the side you want showing through the frame.


9. Now figure out the placement of the rainbow and clouds on the background paper. Put one piece of dimensional adhesive behind two of the clouds and adhere them to the background. Double up the adhesive behind the rainbow and glue that down so it is higher than the clouds. Stick the third cloud behind the right side of the rainbow with a single adhesive.


10. Pop your picture into the frame - I had to remove the glass because it was too tall. If you'd like, add a few extra butterflies flying down towards the rainbow and maybe even some inspirational words.


11. Hang and admire!

 Supplies: DCWV cardstockMMEOctober Afternoon patterned paper, Martha Stewart butterfly punch and circle cutter, Dear Lizzy for AC rub-on

If you make one, I'd love to see! Please post a link to your creation in the comments or if you have any ideas on what to do with the leftover cutouts.

Goodnight!