Showing posts with label party. Show all posts

July 4, 2013

Clearsnap Made In The USA Blog Hop


Clearsnap is Made in the USA so what better time to celebrate that fact than on the 4th of July!

Hop along with our team as they share patriotic projects to ring in this Independence Day here in the US.


Start at http://blog.clearsnap.com after 9am Pacific on July 4, 2013. Enter for your chance to win one of our EXCLUSIVE Limited Edition 3 Color Red, White, and Blue ColorBox Pigment Inkpads!!

Here's the entire Hop List:

http://blog.clearsnap.com
http://stephaniescraps.blogspot.com
http:/www.debbiecole.com/blog/
http://www.tamisanders.com
http://meihsia.blogspot.com/
http://hydrangeahippo.com/blog
http://sabrinaalery.blogspot.com/


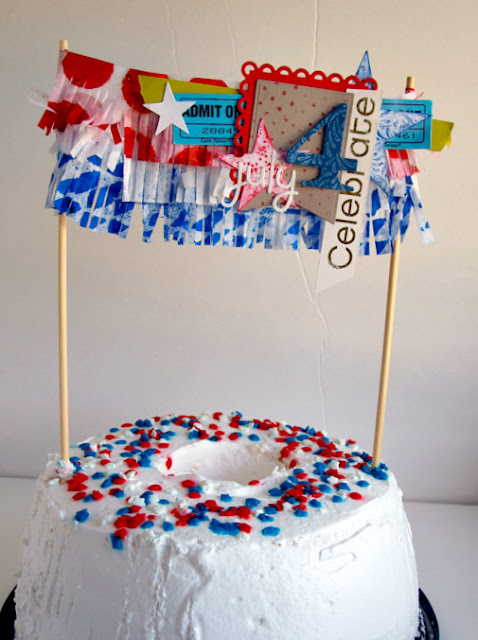
I used the Limited Edition USA inkpad (along with some other great products from Clearsnap) to create a tissue paper fringe party banner. It would be fun to top a cake, as the centerpiece on a table, or super size it to hang from a front porch.


The tissue paper was sprayed with Stephanie Barnards Sprays! Inks in Blueberry and Strawberry along with a couple masks from Crafter's Workshop. I then folded them in half and snipped with a scissors to create the fringe.


The final step is to add as many or a few layers as you like. These die cut images were inked up with the Made In The USA inkpad and several of our Rollagraph stamp wheels. I also added a fun gold element with a Design Adhesive word topped with Gold Designer Foil.

Thanks so much for hopping with us today! Be sure to leave a comment below for chance to win. I'm the last stop on the hop but you can visit us on Facebook for lots more inspiration and fun!

September 10, 2012

Clearsnap + MyStampBox


Monday, monday. 

Just dropping in today to share this name plaque I created for a blog hop with Clearsnap and MyStampBox a couple weeks back. It was made for the adorable daughter of a good friend who loves all things pink and girly :) 

Check out the video tutorial below and read the full post (plus more inspiring projects from the rest of the hop) here


July 31, 2012

Rollagraphed Paper Party Ball


Hi! Just dropping in today to share a video I have up the Clearsnap YouTube Channel - it's a paper party ball to hang with your tissue paper pom-pom displays and uses several Rollagraph stamp wheels + my favorite glitter.

Check out the video below:


May 23, 2012

Pretty Party Banner


Hello! Just dropping in today to share a party banner I created earlier this month for the Clearsnap blog using the luscious Mix'd Media Inx and Embossing Powders. I'll post just the photos below - you can find more details, the video tutorial and a complete supply list on this post.

Have a great day!


May 2, 2012

Banner Tutorial @ Clearsnap


Happy Wednesday!

I have an easy and pretty party banner video tutorial up on the Clearsnap blog today featuring some of the fabulous Mix'd Media Inx and Embossing Powders. Stop in and check it out!

March 7, 2012

Altered Basics Blog Hop


Welcome to the Altered Basics Blog Hop! The Clearsnap Design Team is inking and altering our Basic Necessities, a variety of packaging materials and containers released at the CHA-W 2012 show in Anaheim, CA earlier this year.  These "Basics" allow you to create custom inkpads, mix your own color combinations of Smooch Spritz and glitter, as well as provide a blank canvas for cute altered gifts, like the adorable tins our My First ColorBox Stamps are packaged in. You might recognize packaging from some of your favorite Clearsnap products like the salt shaker style jars from the Donna Salazar Designs Fairy Dust Glitter, an uninked ColorBox inkpad, and the Clear Boxes our Smooch Spritz Assortment Packs are packaged in. We think these Basic Necessities will allow your creativity to soar!

We're also excited about giving away a set of select Basic Necessities items as prize for one hop commenter! Just click on the blogs each day, browse through the post and check out the "Altered Basics," and then leave a comment about your favorite Basic Necessity to be entered to win.

For an extra entry, post the secret phrase "I love the Basics!" on our Facebook Page here: http://www.facebook.com/Clearsnap

We'll choose one winner from all of the comments on March 9, 2012!

March 7, 2012
Sabrina Alery - you are here

March 8, 2012

Don't forget to leave a comment about your favorite Basic Necessity on each blog in the Hop. Happy Hopping!

--the Clearsnap Design Team


From the Basics products, I selected the Jumbo Smooch Spritz bottle to alter. We have a couple birthdays coming up later this month and this butterfly will be positioned with a "toppings" sign to let everyone know where the goodies are for the ice cream buffet.


The inside is filled with candy sprinkles and all the spraying parts are still intact, though hidden. Since it's such an awesome bottle and will surely come in handy sometime in the future, I made sure everything is removable so someday it can again become a bottle for spritzing.


The wings are inked, stamped, sprayed and glittered with several layers of Clearsnap goodness. To start with, I stamped and blended repeating images with a few different sets of the new My First Colorbox stamps on different parts of the wings. There are 5 colors of pigment ink total from both the Classic Pigment line and also the Mix'd Media Inx - Lime, Berry, Chiffon, Honey and Truffle.


The next coat was Smooch Glitz in Pink Fizz and Frost, followed by a light sprinkling of Fairy Dust Glitter. Although I'd like to take credit for drawing in the wing segments myself, I actually cheated here! They were printed on and I just outlined them with a little Smooch in Molasses and added a few spots.


The final layer was a couple different shades of Smooch Spritz - Cosmic Pink and River Mossy. I covered the sprayer portion of the bottle with cardstock and dressed it up with a little trim and pins from the Hydrangea Hippo. So easy and fun!!

So what are you looking forward to creating with the new Basic Necessities?

Next stop on hop the lovely and hilarious - Mary Dawn.

December 12, 2011

My Birthday Girl


Today is the 4th birthday of our youngest daughter!! At the risk of sounding cliche, wherever does the time go? I can hardly believe how big she has gotten or how grown-up she seems every time I look at her. No longer my baby girl, that's for sure.


I didn't want to have a big party this year (it always keeps the kids from having fun when there are too many unfamiliar faces anyway) and instead of a physical gift, we gave her a night out on the town.

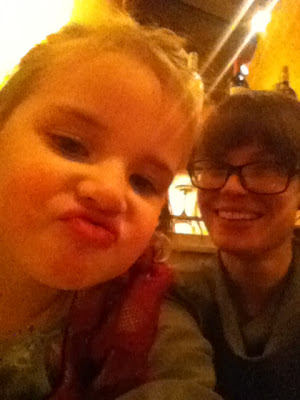
First stop, the salon, where a friend styled her hair in curls, painted her nails and gave her a bit of make-up too. Despite the face the gave her, she was thrilled about it.


Next we stopped for dinner and split appetizers and seafood. She even got to blow out a candle on her dessert. I convinced her to try a few new foods too which is always a plus.


For the grand finale, we saw The Nutcracker Ballet at Hoyt Sherman. I wasn't sure how she would do, but she sat through the entire 2 hours completely in awe, asking me questions about what was going on throughout the show. It was pure magic.

The best part was listening to her recap the story when we got home. "There was a big cheese and the mouse tried to get it but then he got shot." "The little girl was so scared and the monsters tried to get her." "They danced and spinned and they had pretty dresses!"


At home we had a little party with immediate family and chocolate cakes with raspberry buttercream frosting. Yum!


Not sure if you saw the crown that Elizabeth Kartchner made for her daughter's bday but it is the most precious thing and I just had to make one for Rora too. I'll try to take better photos and post those tomorrow.


The girls also both went to get their ears pierced on Saturday night! Both cried for about 5 mins but then were fine. They both said it was worth the pain and can't stop admiring their new bling in the mirror.

Oh my gosh, this is the longest post ever. But I will never ever tire of the girliness these girls bring into our life. That's all.

October 18, 2011

In A Pinch: Gift Wrap


So we had several birthday parties to attend last weekend and amid all the gift choosing and outfit decisions, I completely forgot to buy any sort of gift wrap. Thankfully all the inspiring ways I've been seeing to wrap gifts online lately and my ever expanding craft stash had me covered.

I added a topper to pretty up this plain dress box. It matches what's inside too :)


And here I used patterned paper to wrap a box and also to make some small boxes to hold the pretty treasures inside.

There was one more, but we were in such a hurry I forgot to take a photo!

Lots of fun to pretty up packages. More fun to give and receive.