November 30, 2010

What I Wore - November

Fashion is such a huge part of who I am. There was a time when I neglected it for the sake of inconvenience but thinking back to then something just didn't feel right. And when then I remembered how much fun it was to dress up and how much better it made me feel. Now that I don't work, I have to make do with occasions like grocery shopping and school activities. Unfortunately where I live showing up "put together" gets more strange looks than showing up in sweats. Maybe you can relate?
Inspired by some fashionable bloggers such as Elsie, Kathleen of Grosgrain and Jacinta of Model Mumma, I photographed some outfits to share with you and hope to keep this fashion round-up in rotation from here on out.

Now onto the outfits - I'm sure you're just DYING to see...
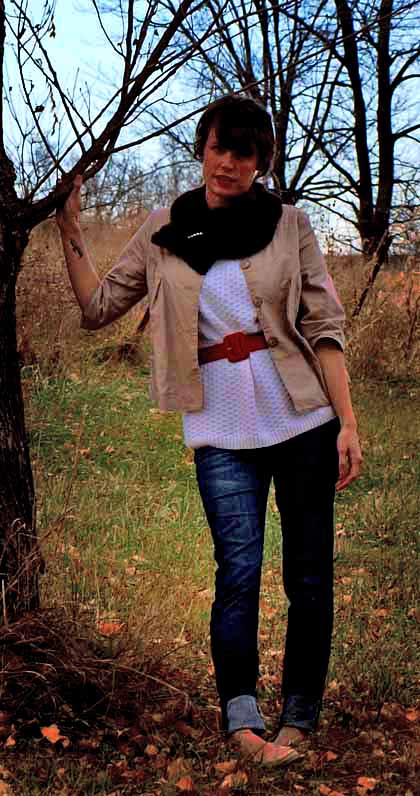
Look 1: Ballet class drop-off
Crotchet sweater - handmade gift, linen jacket - thrifted, skinny jeans - JCPenny,
ballet flats - thrifted, mink collar - vintage, red belt - thrifted, pearl pin - vintage

Look 2: Optometry appointment
cardigan - thrifted, yellow T - Proenza Schuler for Target, jeans - Target
peep-toe flats - Steve Madden, scarf - Marshall's, hair pin - made by me here

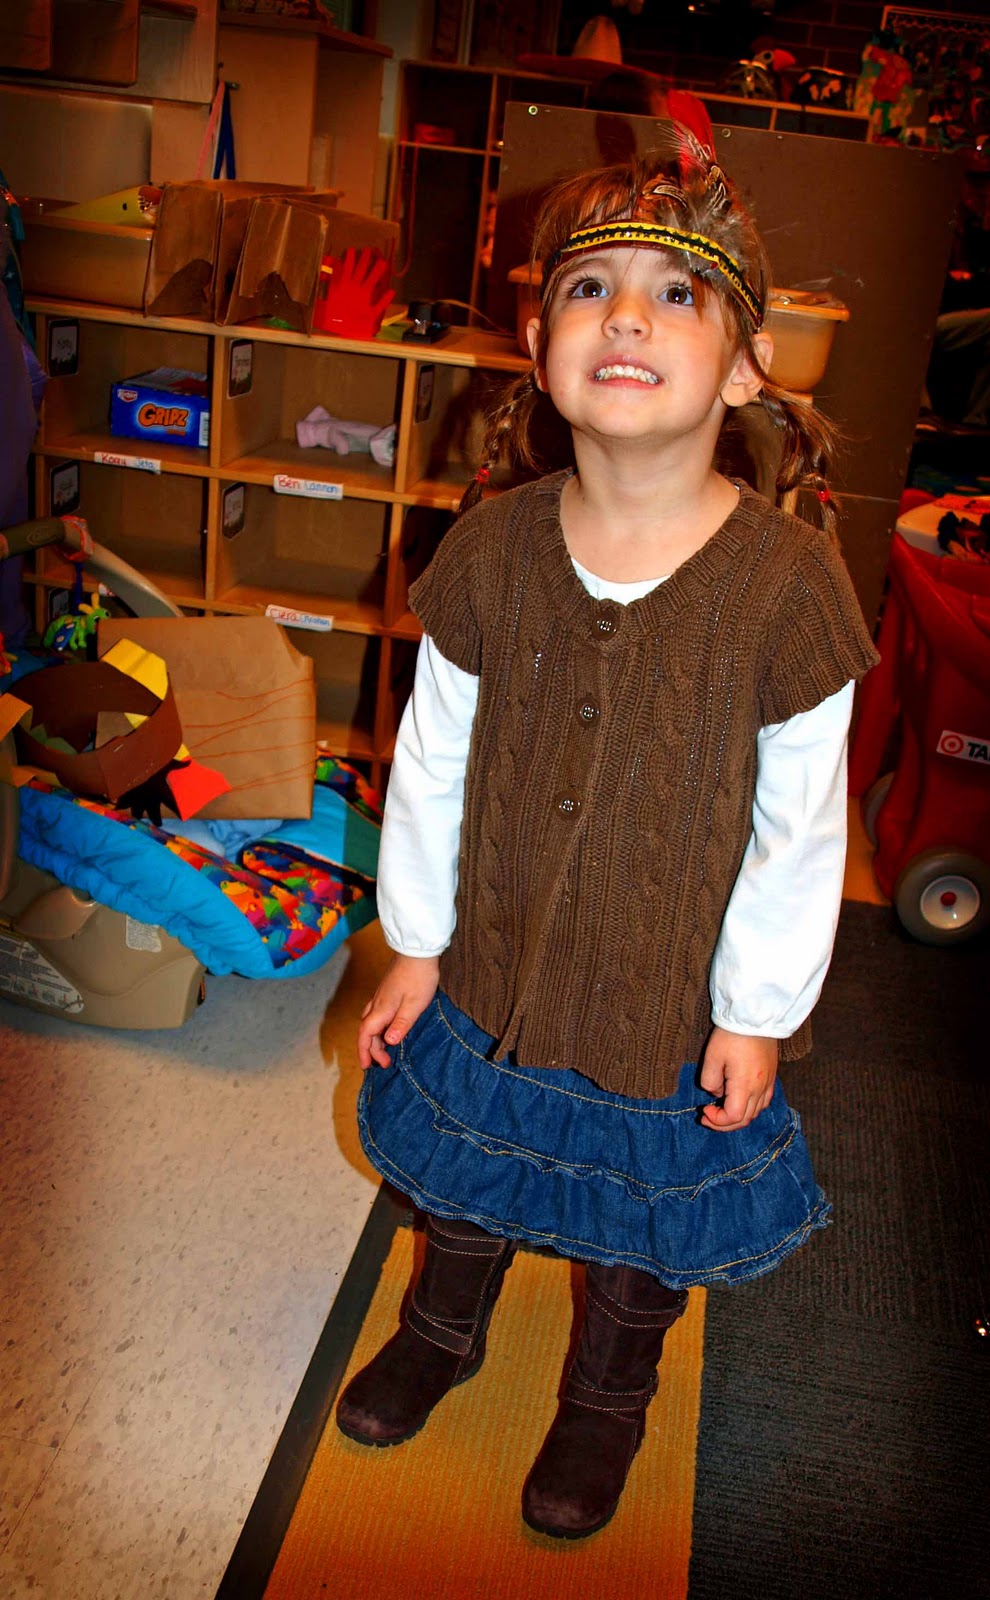
Look 3: Christmas Shopping
Woodland Nymph Anda Dress - made by me here, jean jacket - Gap, motorcycle boots - BCBG, tights - Victoria's Secret, belt - Gap, Scarf - Burlington Coat Factory, mittens - H&M, sunglasses - Dollar Store

Look 4: Date Night
Floral Top - thrifted, leather jacket - vintage, skinny jeans - Target
boots - Nine West, bag - thrifted

Let me know what you think!!

November 29, 2010

J'adore Card Set


A few girl friends' birthdays are coming up soon (today and next month) so this weekend I whipped up these cards inspired by my best pal. She loves classic french chic and anything feminine and romantic - hopefully she approves!


The first one is for the inspiring friend in question. We were just talking the other weekend about dress forms - isn't the pearl necklace fab! The sentiment translates to: I adore your style. Neither of us speak French, which is probably silly but I think she'll appreciate it.


The next card is for another fabulously fashionable friend who I don't get to see often enough. I was so excited to find that chipboard piece that perfectly matched the shape of the flower rub-ons and I misted it using a combo of Maya Pink Lemonade and TA Vintage Pink to match the shade as well.


I really like this final card too as I am a big fan of silhouettes. The background was originally white, which just seemed so bright. Since everything was already glued in place, I painted on some mist in Buttercream but def regret it. Have not found a good use for that color mist yet! But everything else makes me happy - the doilies, bow, crown and jewels - all so girly.

Hope you had a wonderful Thanksgiving weekend (USers). Christmas season, here we come!

November 26, 2010

Give Thanks with a Pop of Orange

Hope all you lovelies had a wonderful Thanksgiving with family and loved ones yesterday! I was abruptly awoken at 5 am with touch of the flu so did not get to enjoy all the rich foods (well not for more than a few minutes) that make this day one I look forward to all year. No worries, I'm feeling much better today and have eaten far more than my share of pumpkin pie.

Here is a card I planned to share yesterday that was created with a little color inspiration from the busy, busy girls of Design Dollies. Who would have thought it was possible to create using black, white, gray and orange with feeling too Halloweeny?

(Sorry about the bad lighting and glare, this whole dark by 5 o'clock deal is kind of hard on my limited picture taking abilities.)

I added a little stitching, some grey paper from a Halloween party invitation and some very difficult rub-ons and although this is not a color scheme I would have come up with on my own, I really like how the card turned out. What do you think? This challenge is up until Sunday the 28th - you should play along too!

Holiday Hook-Up at Paper Issues!

Can you believe the holiday season has officially started?! That means there is a new challenge up at Paper Issues!! Stop by to get a little inspiration kick start and then link up any projects you've created in the name of Christmas/Hanukkah/Kwanzaa/Festivus/... you name it!

Here's my creation - a 3 piece art set to hang above the stockings:
My husband promises to make some custom frames to hang them in but well, on his schedule - it just might be a while. I used this tutorial by the fantastic Emily Pitts to create the snow-stormy background and then just turned over the snowflakes used as masks and adhered to give a little extra dimension.


To make the tree, just staple strips of paper end to end and adhere in a general tree shape. I love blue and silver for Christmas colors so this will fit in so well!

So what have you been making? You have until December 25 to link up!

November 24, 2010

Refashion: 2 Ill-fitting Tops to Sweater Set


Sometimes the way ideas come you is just magical and other times it seems so obvious you wonder why you didn't think of it before. The second instance is the case for this sweet sweater set. I was organizing the girl's dresser when I came upon two shirts that were cute but just didn't fit that well. The long sleeve tee was just too sloppy and the sweater rode up. Into the donation pile they went. Then I saw them sitting there on top of one another, all matchy-matchy and it occurred to me that they belong together.

Of course I forget to take the before photos! To make the pink under-tank, I cut off the sleeves, made ruffle strips and attached them to the chest. It also had to be taken in about 4 inches - that material is way too loose. With the cardigan, I cut it down the center, sealed the seam with some leftover arm material and added some elastic in the neckline to keep it from drooping.


To help it match just a little more, I appliqued hearts to the elbows like this ModCloth cardi and added a bow to the tank to top off the ruffles. It turned out just darling if I do say so. What have you remade lately?

November 23, 2010

Printable + DIY: Toddler Hipster Glitter Glasses

I am such a sucker for kid's sunglasses. And the cooler they are, they faster they seem to disappear. We've went through Disney Princess, Hearts, Rhinestones, Cat Eye and Aviators only to be lost days and if we're lucky weeks after purchase. My very favorite, the heart glasses disappeared after crossing the street this summer at the state fair. She seriously put the glasses on, we walk across the street to the next building, enter, notice glasses are gone, frantically retrace steps to recover - nope, the glasses are gone in a matter of moments. I could have cried, but instead bought another, nearly as cute pair.


So here is a disposable alternative in Cat Eye and Aviator that might be appropriate for a birthday party craft, relief from winter break boredom or even a kiddie New Year's celebration.

Supplies:
Glitter Glasses Printable - Download
sharp little scissors or craft knife
glue stick, spray adhesive or a very steady hand :)
Mod Podge
foam brush
chunky glitter


Step 1: Download glasses and cut out pieces. Attach arms to tabs on lenses.


Step 2: Using a glue stick or spray adhesive, adhere glasses to an empty cereal box or other flexible cardboard. Trace and cut out.


Step 3: Smear a thick coat of Mod Podge onto the printed side of the glasses. Sprinkle glitter generously, pat down to help attach and let dry for about 20 minutes.

Step 4: Use a blow dryer on low to help dislodge any loose glitter and then coat with another layer of Mod Podge or a sealer like Krylon Workable Fixatif (I have this on hand for some random, unknown reason) to seal and keep everything in your home from getting all sparkly.


These should fit kids ages 2-4 but probably aren't a good idea for little ones who still stick things in their mouths. Try resizing the document if you'd like to make them a little bigger for older kids. Now strike a pose!


November 22, 2010

Grandma and Grandpa


Grandma and Grandpa. Not two people I would normally have share a layout but I think it's nice that despite their differences, they can get along enough for the sake of their granddaughter. Gloria's page, One Day There Were Happy, also inspired the idea for making a page about two people who aren't together any more. I tried to help symbolize this by the block of separation between the photos.

This layout was based on the 11/14 SC Sunday Sketch by Kimberly Neddo. I really liked her journaling down the center of the page and how she underlined the words with thin strips of paper.


To get some more photos from from trip to Sioux Falls in the album with minimal effort, I stuck them in a divided page protector with a title block on the front and journaling block in the back. I may still do individual pages for these photos or maybe not. Now I don't have to feel bad about not getting around to it.


Hope you all had a great weekend! I was very lazy and unproductive. It was nice.

November 19, 2010

My name is Sabrina and I have Issues.


Paper Issues that is! I was chosen along with 29 other insanely talented girls to join the Paper Issues creative team and have been prancing around the house in excitement ever since!!

The current issue, Save Thanksgiving, is up until November 25 so be sure to drop by and link up your Thankful and Autumn related projects before then. Can't wait to see you there!

Thanks with Dessert


We really are lucky to have such great neighbors and rather than waiting til Christmas to share my appreciation, I got a head start by baking and making a few cards to hand out during this season of gratefulness. It's so wonderful to know that if we need a last minute babysitter, someone to jump start the car battery or even someone to till the garden, help is only down the road.

My favorite of the set:


I found this amazing recipe for Pumpkin Apple Streusel Muffins on All Recipes and doubled it to make one set of muffins and two loafs of bread. The flavor from the apples and spices is so yummy and you get all the health benefits of pumpkin but the flavor doesn't take over. I substituted 1/4 of the sugar with brown sugar and 1/4 with honey to give it even more depth. Moist and delicious. Will definitely be making this again next autumn.


Who are you grateful for and how do you show them appreciation? I'd love to hear!

November 18, 2010

1 Little, 2 Little, 3 Little Indians


Yesterday at preschool the teachers put on a Thanksgiving feast, and the kids dressed as either Pilgrims or Indians. I put together this little Indian headband for Leah to wear using a leather belt for the band, a bit of ribbon and some pheasant feathers. Placed on top of two braids, she played the part well.

 A couple pics from inside the classroom:


If you plan on making something similar for your child (or self!) or just need a couple moments of calm, I recommend heading over to Little Doe to check out the gorgeous nature inspired headpieces that seem to be popping up in every style magazine I see. It immediately takes me back to center.


November 17, 2010

Autumn Leaves


Autumn is in every way my favorite time of year. The mild temps, the changing colors and oh the chunky knits!! More than any other season, I spend so much time outside with the kids in the fall. One crisp day last week, the kids and I pulled out the rake and wrangled the leaves into a giant pile before jumping in. And since I had yet to use this new leaf punch bought on sale at Joann's a few weeks back, it seemed like a great opportunity to document the photos from that day. Journaling reads: "Anticipating the jump while golden leaves are raked into a mountainous heap is an austere test in patience for three anxious toddlers." Yes, I used my thesaurus.


To create some extra dimension behind the punched leaves, I masked off an area and placed the negative from the punch. I stamped using the grunge stamp from Kaiserkraft with black, brown and olive inks, then sprayed Mr. Huey mist in Atmosphere and Maya Mist in Blue Cornflower. When cleaning out my stash this weekend, I found some BG Granola and thought it would be perfect to use for the challenge over at Candy Shoppe Designs - use animals or animal print in your design. I've got it covered with tiger and zebra prints. The winner will receive an awesome package full of goodies from Blue Moon Scrapbooking - wish me luck!

November 16, 2010

DIY: Natural Grass Wreath


 Autumn in nearly over and in just 10 short days we will be digging out the Christmas decor! Can you believe how fast this year went by or was that just for me?! Other than the grass and stick display on the porch from this post, I have completely neglected decorating for Thanksgiving. No worries, because I'm making up for it this week with 4 posts full of thankful projects. Starting with today, I'd like to show you how to make a natural grass wreath with nothing more than some overgrown grass, twine, two hands and your knee.


Step 1: Gather some tall, dead grasses. If you live in a rural area like us, it should be plentiful in the ditches and along the road and if not, this may be the perfect opportunity to get out and take a little nature hike! Dry grass is ideal but if it rained recently (or snowed!) in your area, just hang the grass upside down for a couple days to dry out.


Step 2: Tie the grass together at six inch intervals with some twine. 


Be sure to tie it tightly.


Leave the fuzzy seed tail ends loose.


Step 3: Using your knee, break the grass between the tie-offs along the entire length of the grass stalk. Then go back and break where the ties are. This will make it nice and pliable and easy to shape into a circle.


Step 4: Twist and bend into a wreath shape and secure with more twine. You can make it more circular or more oval if you like.


Step 5: Decorate as you please. I twisted 3 yards of glitterly ribbon around the wreath.


Tied it around the hook with a bow.


Added another bow from this tutorial, cut off the grass seed ends and tucked them in behind the bow.


Punched some paper leafs with Crate Paper's Chemistry.


Secure with stick pins.


And there you have it folks - a natural grass wreath! I realize these are probably pretty cheap to buy but the best part for me was taking the kids out, finding the perfect grass, cutting and hauling it back up to the house and basically making something pretty from nothing. The kids are proud of it and I am too.